


We’ve all heard the horror stories (or lived them ourselves): a beautiful new rug arrives only to look comically small in the living room, or a hallway runner ends up a foot short of the doorway. These “rug regrets” are all too common – but completely avoidable with the right measuring know-how. In this guide, we’ll walk you through measuring for custom area rugs and custom runners (including hallways and staircases) so you can order with confidence. Our friendly, designer-forward tips will help you eliminate common sizing mistakes and ensure your rug is made-to-measure for your space. Let’s get started on getting the perfect fit!
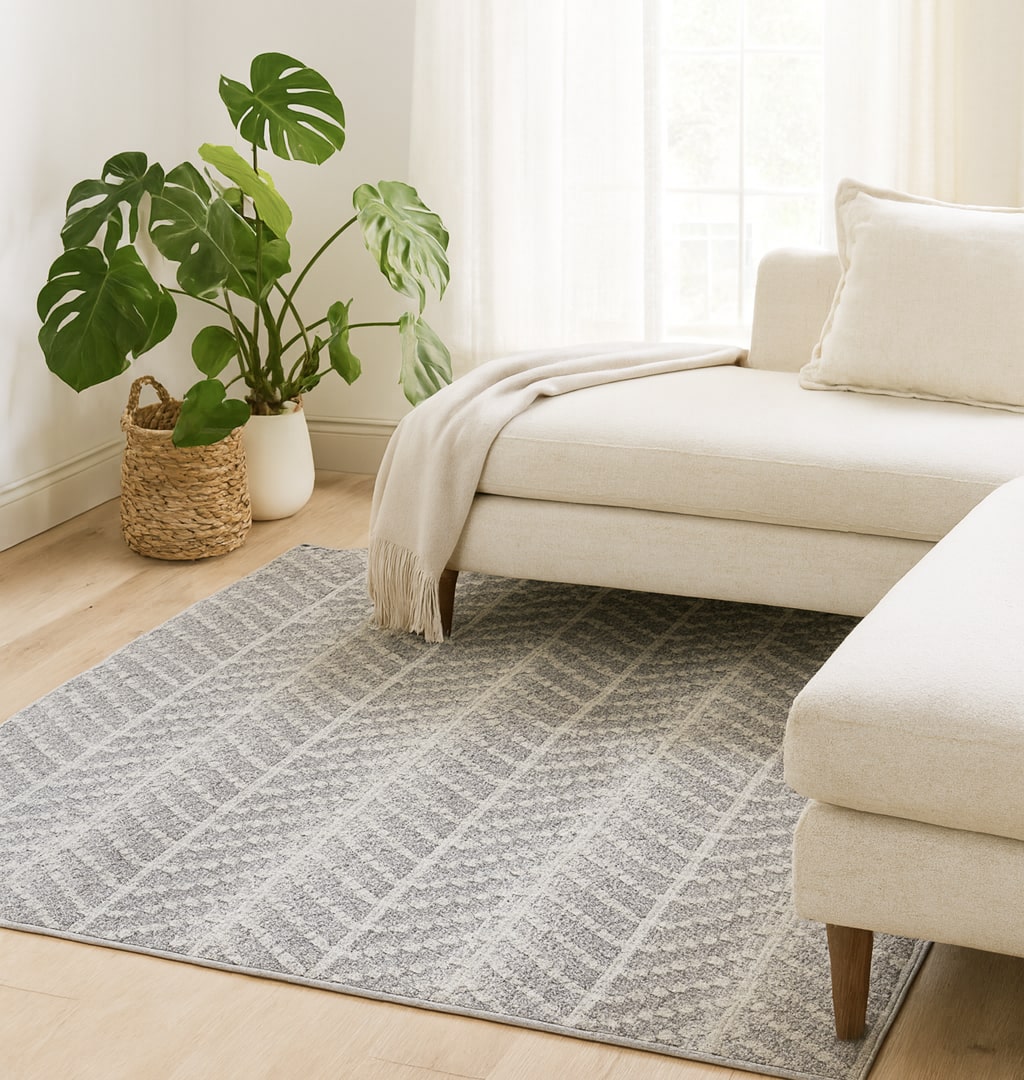
Living Room: Getting the Right Rug Size

One of the biggest mistakes people make in living rooms is choosing a rug that’s too small. Interior designers say if your living room rug can’t fit under at least the front legs of your sofas and chairs, “then it really doesn’t fit.” (What To Do With A Rug That Won't Fit — DESIGNED) A rug that’s undersized leaves furniture floating awkwardly and can even pose a tripping hazard at the edges. On the other hand, a well-proportioned rug will anchor your seating area and actually make the room feel larger and more cohesive ( 6 area rug mistakes to avoid: experts advise what to do instead | Homes and Gardens). Here are some measurement tips to get your living room rug size just right:
- Aim for Front Legs On the Rug: At minimum, the front legs of all major seating pieces (sofa, loveseats, chairs) should sit on the area rug (10 Area Rug Placement Dos and Don’ts). This anchors the furniture and prevents the rug from looking like it’s “floating” in the center. (Designer Carla Aston puts it simply: if your rug isn’t under those front legs, “it really doesn’t fit.” (What To Do With A Rug That Won't Fit — DESIGNED)) Ideally, all four legs of each piece can rest on the rug for a more expansive look, but in smaller rooms front-legs-only is a workable approach – just be consistent for all pieces (Choosing THE RIGHT Rug Size For Every Room (All Of Our Tips And Tricks) - Emily Henderson).
- Go Bigger If Unsure: When in doubt, size up your rug. It’s a mantra many decorators share: “When in doubt, always go a size larger. A larger area rug will visually make a room feel more expansive.” ( 6 area rug mistakes to avoid: experts advise what to do instead | Homes and Gardens) Choosing a slightly bigger rug (or ordering a custom area rug to your room’s dimensions) helps avoid that chopped-up look a too-small rug creates. Remember, you can always leave a border of bare floor showing; about 12–18 inches of exposed floor around the rug edges is a common rule of thumb in larger rooms (Finding the Perfect Fit: Area Rugs). This frame of floor acts like a “margin” that makes the rug look deliberate and keeps the room balanced.
- Measure Your Seating Area: Instead of guessing standard sizes, measure the layout of your seating group. Use masking tape to outline where you’d like the rug to cover on the floor (Finding the Perfect Fit: Area Rugs). This handy trick lets you visualize different rug sizes in your living room and find what looks best. Measure the taped outline to determine the ideal custom rug dimensions. Pro tip: ensure the tape extends at least 6–8 inches beyond each side of your sofa (Choosing THE RIGHT Rug Size For Every Room (All Of Our Tips And Tricks) - Emily Henderson) so the rug width isn’t narrower than the couch – a rug that’s wider than the sofa on both sides will feel appropriately scaled.
- Plan for Walkways and Doorways: While placing your rug, account for any doorways or main walkways in the room. You don’t want the rug’s edge ending right in a high-traffic doorway – not only is that visually unappealing, it’s also a tripping hazard (Finding the Perfect Fit: Area Rugs). If possible, have the rug extend beyond door swings or start it further into the room so that doors can open freely over the flooring. Also, leave about 18 inches of space for a clear walkway between large furniture pieces and the rug if the room allows (Choosing THE RIGHT Rug Size For Every Room (All Of Our Tips And Tricks) - Emily Henderson) – this prevents feeling cramped and keeps foot traffic flowing.
Keeping these guidelines in mind will ensure your custom area rug truly ties the living room together. The goal is a rug that’s proportional to your seating arrangement and leaves no doubt that it was made to fit your space. You’ll be able to kick back (with all your furniture comfortably on the rug) and never worry that you should have gone bigger!
Dining Room: Made-to-Measure for the Dining Area
In the dining room, proper rug sizing is critical both for aesthetics and functionality. Have you ever tried to slide a dining chair back, only for its legs to snag on the edge of the rug? Not fun – and a sure sign the rug is too small. Many buyers regret choosing a dining rug that barely fits the table, because it creates an awkward border that chairs constantly catch on. To avoid this, you’ll want a rug that extends well beyond your dining table on all sides.

- Keep Chairs Fully on the Rug: The golden rule for dining rooms is that all chairs should remain on the rug even when pulled out from the table (10 Area Rug Placement Dos and Don’ts). That means measuring not just the table, but the space occupied by chairs when someone is seated. A quick formula: measure your table’s length and width, then add about 4 feet to each (5 Rug Mistakes That Are Making Your Space Look Smaller). Those extra 48 inches (approx. 122 cm) – which equates to 24 inches on each side of the table – give room for chairs to slide in and out without tumbling off the rug’s edge. In practice, a dining table that’s, say, 3×6 feet would pair well with a rug around 7×10 feet (or larger) to accommodate the chairs. If you have a round table, add at least 24″ around the diameter. For example, a 48″ round table would need roughly a 8′ round rug (96″ diameter) to allow space for chairs.
- Double-Check the Fit: Before finalizing your rug size, test it out. Just as with the living room, you can mark the outline on the floor. Alternatively, pull your dining chairs out as if people were sitting down, and measure the full footprint those chairs make. Make sure your rug covers that entire footprint. As one expert notes, a rug too small in the dining room will “interfere with moving the dining chairs in and out”, which is a common mistake ( 6 area rug mistakes to avoid: experts advise what to do instead | Homes and Gardens). You don’t want dinner guests feeling like their chair is half on-half off the rug – that’s a recipe for wobbling (and spilled wine!).
- Allow Some Border: While bigger is generally better here, be mindful of the room’s fixed features. Ideally, leave about 8–12 inches of bare floor between the rug edge and the walls or sideboards (Choosing THE RIGHT Rug Size For Every Room (All Of Our Tips And Tricks) - Emily Henderson) so the space doesn’t feel cramped. This also helps center the rug nicely under the table. If your dining room is small and you can’t spare much border, err on a slightly smaller rug that still meets the chair rule above – but usually a custom-sized rug can be ordered to perfectly balance coverage and border.
- Consider Table Extensions: Do you occasionally host big family dinners with the table extended or leaves added? If so, plan for the largest size of your table when measuring for the rug (Finding the Perfect Fit: Area Rugs). It’s better to have a rug that’s a bit oversized during everyday use than one that becomes too small on special occasions. With a custom rug, you can get dimensions that accommodate the table fully expanded, avoiding another common regret.
Finally, think about rug thickness in relation to your chairs. A very thick rug or high-pile carpet might catch chair legs even if the size is right. Many designers recommend a low-pile or flatweave rug for dining areas so chairs slide easily (Choosing THE RIGHT Rug Size For Every Room (All Of Our Tips And Tricks) - Emily Henderson). This isn’t a measuring issue per se, but it will make your dining experience smoother (and safer). With the right size and type of rug, your dining room will feel professionally pulled together – no more chair-clawing rug edges or wobbly seats. Bon appétit, minus the rug mishaps!
Hallway Runner: Measuring a Custom Hallway Runner

Hallways are another zone where rugs are often mis-sized. Too short, and the runner looks like it’s awkwardly “floating” in the hall; too long or wide, and it starts to behave like wall-to-wall carpeting (which isn’t the look we want for a runner). The goal with a made-to-measure hallway runner is to cover the high-traffic area of your hall while leaving a tasteful border of flooring visible around it. Here’s how to measure for a hallway runner that fits just right:
- Cover the Critical Length: Start by measuring the length of your hallway from end to end. Generally, you’ll want your runner to cover the majority of this length, but not touch right up to the walls or doors at the ends. Leaving a bit of floor showing at the ends creates a framed look and prevents the runner from encroaching on doorways. A good guideline is to leave about 4 to 5 inches of open floor at each end of the runner (Beija Flor World). For example, in a hallway that’s 10 feet long, a runner about 9 feet long centered in the hall can look ideal – you’d have roughly 6 inches of floor visible at either end. This spacing keeps the rug from looking like an afterthought and avoids edges that could curl up against baseboards or thresholds.
- Decide the Width: Measure the width of your hallway next. A runner should be narrow enough to show some of your hard floor on each side, rather than spanning wall-to-wall. Typically, allow 4–6 inches of floor to show on each side of the runner (Beija Flor World). The exact border can depend on hallway width – in a very narrow hallway you might only manage 3-4 inches each side, whereas a broader foyer or corridor could handle up to ~6 inches showing. Be careful not to reveal much more floor than that, though. Designers caution that showing more than ~6 inches of floor on each side can make the runner look too skinny, like a floating “landing strip” down the middle (Finding the Perfect Fit: Area Rugs). For instance, if your hallway is 4 feet (48 inches) wide, a runner around 3 feet wide (36 inches) would leave 6 inches of floor exposed on each side – a nicely balanced look. Many off-the-shelf runners are 2'6″ (30 inches) wide, which would leave 9″ per side in a 4-foot hall – possibly a bit too much. This is where ordering a custom runner width (e.g. 36″) can give a more tailored, designer result.
- Watch Doorways and Obstacles: If your hallway has any doorways along its length (closet doors, room entrances, etc.), factor them into your measurements. You don’t want the end of a runner to stop exactly under a door that opens out into the hall, nor do you want it so long that it bunches up at a doorway. Ideally, the runner should either end before the doorway or extend long enough to clear it, so you’re not half-covering a threshold. Also consider door clearance: if a door swings over the hallway, ensure there’s enough gap under the door for the rug’s thickness (this is usually fine with most runners + a thin rug pad, but low-clearance doors may require an extra-thin rug solution). Mark on your floor where any doors swing, and ensure the runner length avoids those swing paths or lies flat beneath them when the door is closed.
- Secure It and Pad It: Hallway runners can be slippery since they’re long and often on hard flooring. Once you’ve got the right size runner, make sure to use a quality rug pad or non-slip backing to keep it safely in place. A loose runner can slide “like a banana peel,” posing a major tripping hazard if not anchored (How to Keep a Rug in Place on Wood Floors: 4 Ways That Really Work - RugPadUSA). The combination of a custom-cut rug pad and the correct runner dimensions will keep your hallway both beautiful and safe – no curling corners or sudden slips underfoot. A rug pad will also add a bit of cushion, which is welcome in a long walking area.
Measuring tip: Hallways can be deceivingly long – if yours is longer than standard store runners (often 8 or 10 feet max), consider ordering a custom runner length instead of using two smaller rugs end-to-end. One continuous runner cut to your hallway’s length will look more seamless and won’t have a gap or overlap that could trip you up. The good news is many brands (like ours!) offer made-to-measure hallway runners so you can get an exact length. Take the time to measure precisely, and you’ll end up with a runner that elevates your hallway, not one that gives you “rug regret” every time you walk by.
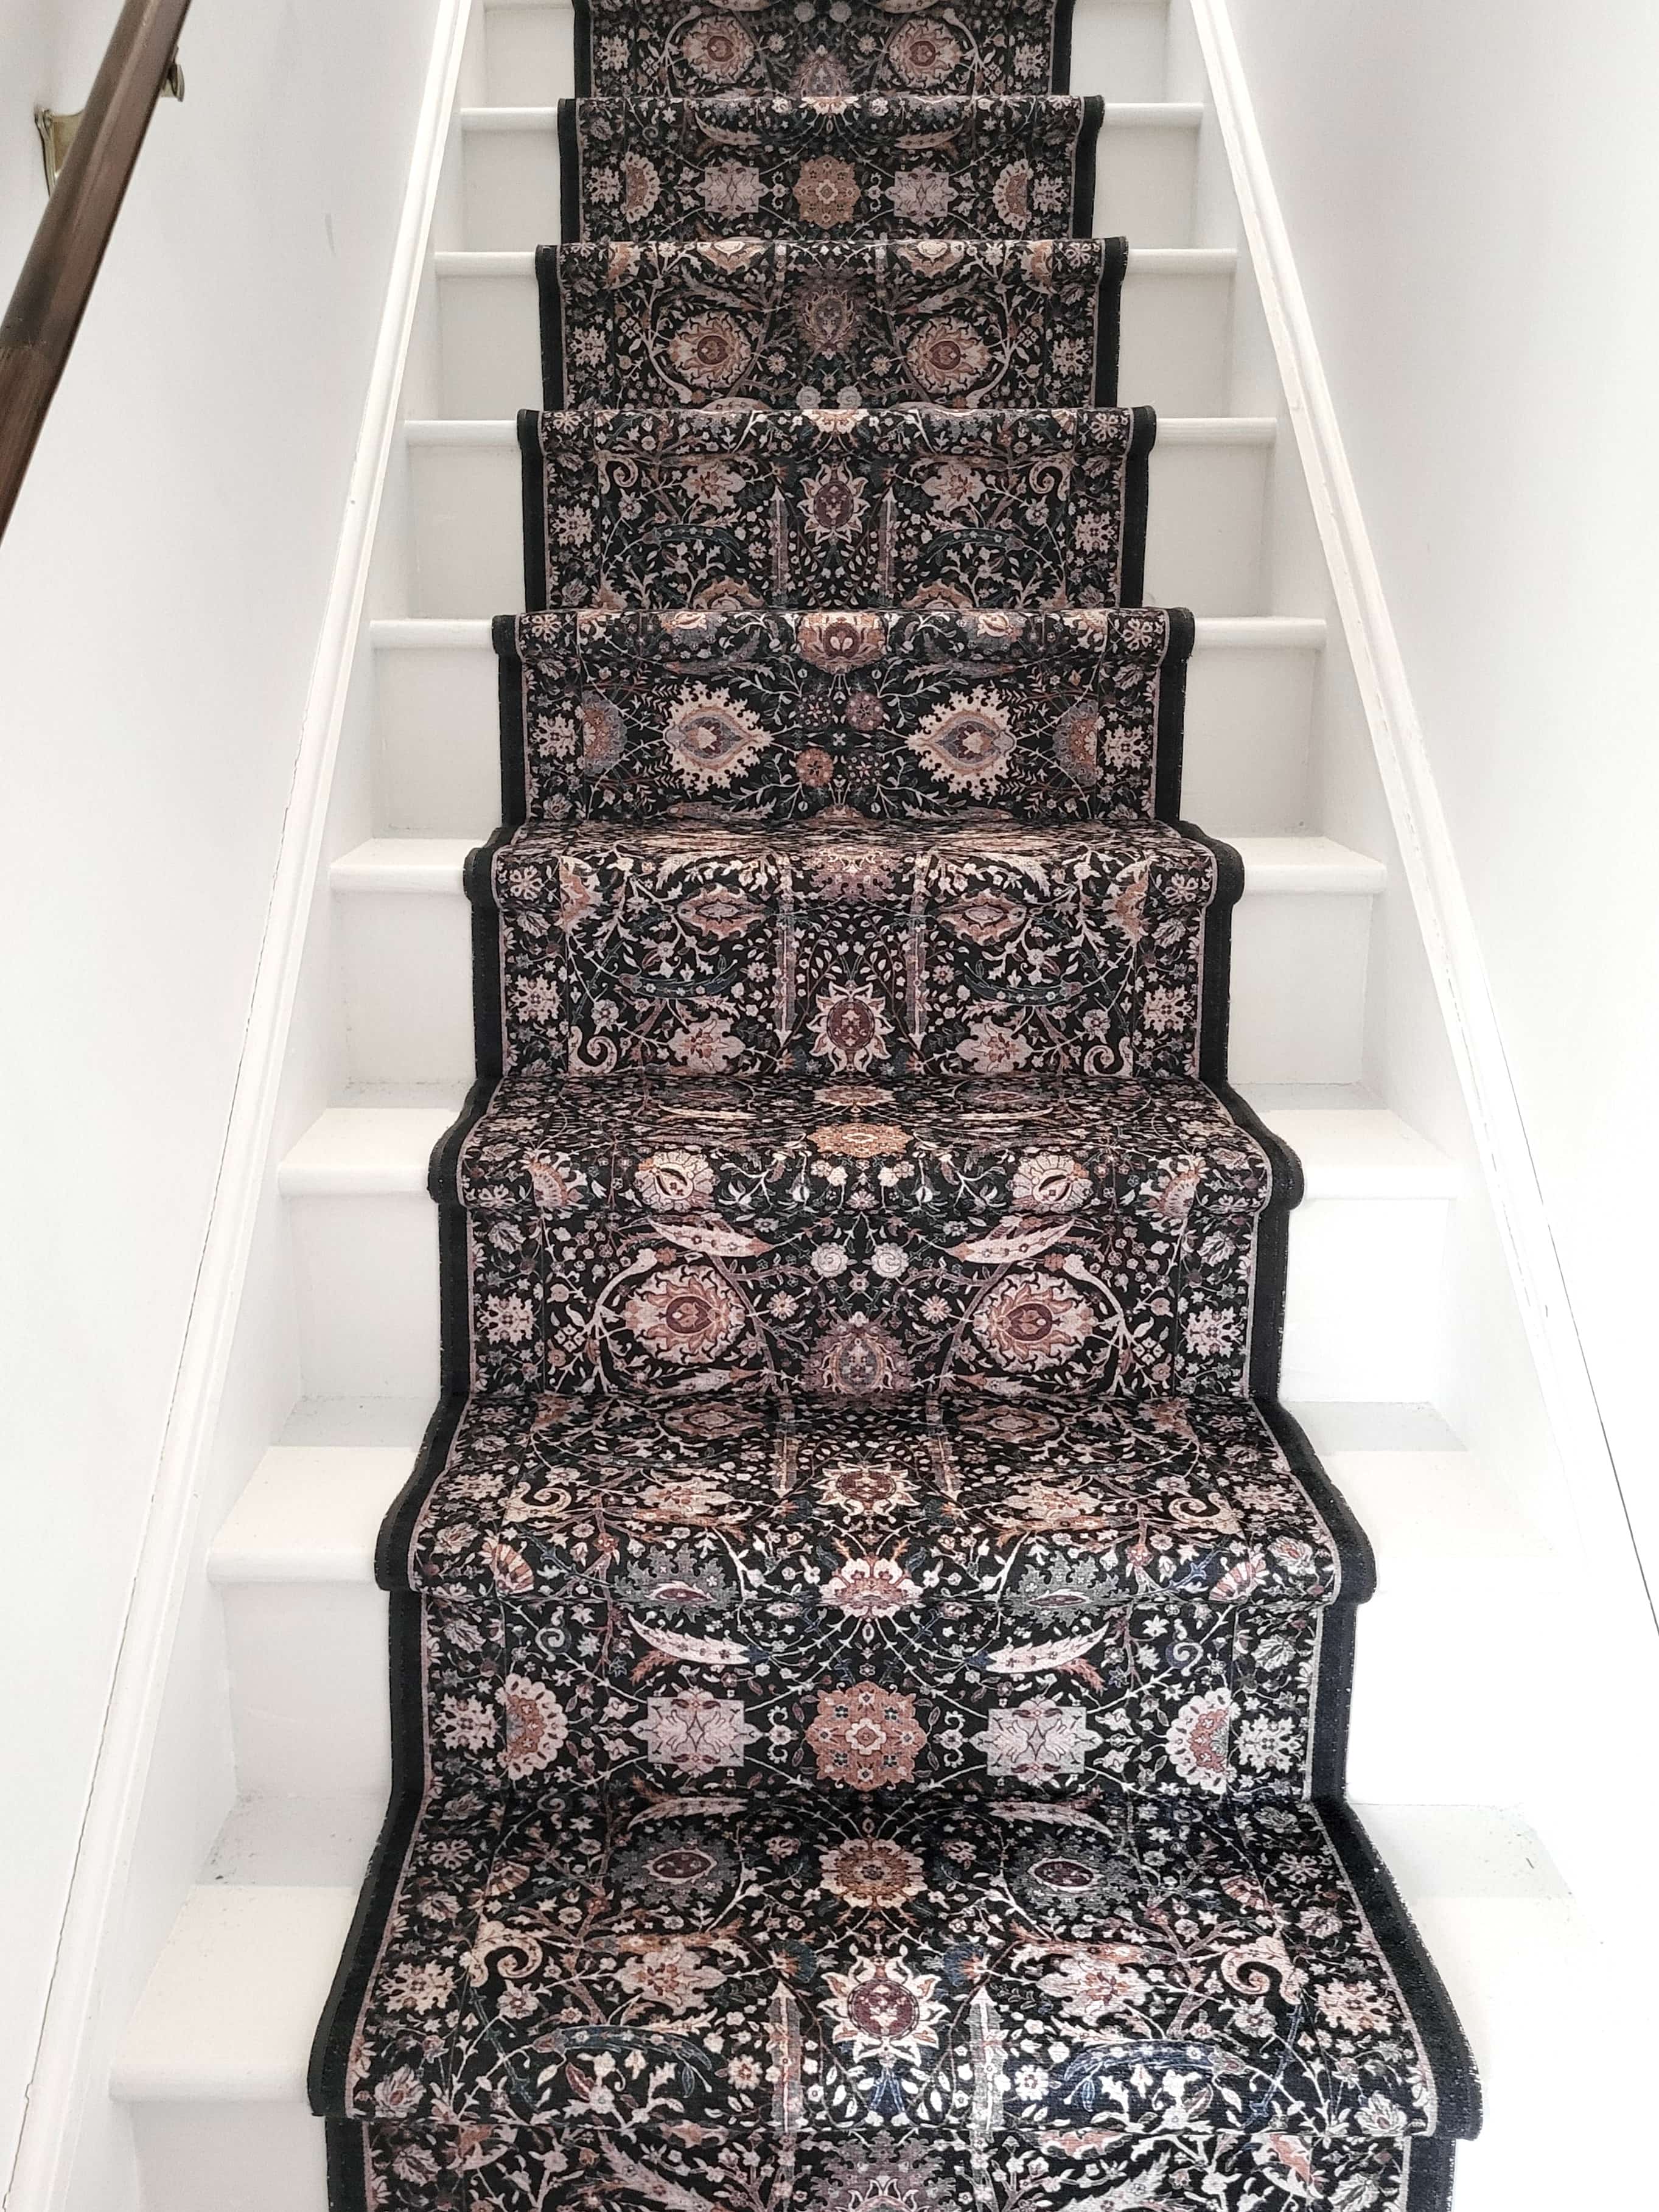
Staircase Runner: Measuring for a Custom Stair Runner

Staircase runners not only add style and softness underfoot, they also improve safety on hardwood stairs – but only if they fit correctly. Measuring stairs might seem intimidating (lots of little measurements!), but we can break it down into simple steps. The key is to determine the total length of rug needed to cover your stairs and the proper width so that the runner leaves a nice margin on each side. Let’s climb through the process:
(How to Measure for a Stair Runner – Direct Carpet ) Measuring a staircase for a runner involves accounting for both the tread depth (yellow arrow) and the riser height (red arrow) of each step. Using a tape measure, you can record the length of one step (from the bottom of one riser, across the tread, to the top of the next riser) and multiply by the number of steps.
- Count Your Steps: Begin by counting how many individual stairs (steps) will be covered by the runner. Don’t forget to include the very top riser (the vertical part at the top landing) if your runner will end at the landing floor, as well as any bottom floor space if you plan to start the runner on the first floor before the steps. For example, a standard straight staircase in a two-story home might have 12 steps (treads) and 13 risers (including the riser at the top landing) (How to Measure for a Stair Runner – Direct Carpet ) (How to Measure for a Stair Runner – Direct Carpet ). Jot down the total count of treads and risers that need covering – this will be important for calculating length.
- Measure One Step’s “Run”: To figure out how much length each step requires, you’ll measure the combination of a tread and riser – essentially the part of the runner that goes over one step. There are two ways to do this: (1) Measure the tread depth (the flat part you step on, from the front edge to where it meets the riser) and the riser height (the vertical part) separately, then add them together. Or, (2) do it in one go: place a tape measure at the bottom of a riser, run it up and over the tread, and stop at the top of the next riser (How to Measure for a Stair Runner – Direct Carpet ). This will give you one continuous measurement covering the face of one riser plus the top of one tread (including the nose of the step). For a typical staircase, this might be around 18–19 inches or so (How to Measure for a Stair Runner – Direct Carpet ) (for example, a 7″ riser + 11″ tread = 18″). Write down this one-step length.
- Calculate Total Runner Length: Now multiply that single step length by the number of steps you counted. This will give you the total length needed to cover all the treads and risers continuously (Basic Measurement Guide for Stair Runners). Don’t forget to add a little extra for any additional floor coverage at the bottom or top of the stairs if desired (for instance, if you want the runner to extend a few inches onto the upstairs landing). It’s wise to also add a small buffer for safety – installers often suggest ordering an extra foot of runner material just in case (How to Measure for a Stair Runner – Direct Carpet ). This buffer accounts for any minor miscalculations, pattern alignment, or the need to wrap the top/bottom edges. For example, if your calculation says 19 feet of runner, ordering 20 feet is a smart precaution. You can always trim excess, but you can’t add length if you come up short! (How to Measure for a Stair Runner – Direct Carpet )
- Don’t Forget Landings or Curves: If your staircase has a landing in the middle (like an L-shaped or U-shaped stair), measure that landing area separately (length and width of the flat landing) and add that to your runner length. Often the runner will turn at the landing and continue, so you need enough material for that flat section as well. If you have winders (angled steps) or an unusual stair layout, it may be best to consult with a professional or refer to a detailed stair measuring guide – but the same principle applies: measure the total path the runner will take, including every tread, riser, and landing.
- Choose the Runner Width: Standard staircases are around 36″ wide, and you typically want to leave a border of the wood or tile visible on each side of the runner for a classic look. Aim to have about 2 to 4 inches of stair exposed on each side of the runner (How to Carpet a Spiral Staircase). This means a runner width about 4–8 inches narrower than your stair width. For example, on a 36″ wide staircase, a 28″ wide custom stair runner is a popular choice, showing about 4 inches of wood on each side (Choosing the Perfect Width for Your Stair Runner: A Comprehensive Guide). If your stairs are narrower (say 30″), a 22–24″ runner might suffice; if they’re wider (say 48″ grand stairs), you might go up to a ~40″ runner. The exposed wood border on each side gives a balanced framing effect and avoids the runner looking like full carpeting. Besides aesthetics, make sure the runner is wide enough that your foot comfortably lands on it when using the stairs – safety first. (For most adults, a ~27–30″ wide runner on standard stairs provides plenty of landing area for the foot.)
- Installation Considerations: With measurements in hand, you can confidently order your custom stair runner. When it comes time to install, proper installation will ensure your measurements translate to a snug, safe fit. Runners are typically installed in one of two styles: waterfall (where the carpet drops straight down from the edge of each tread to the next riser) or Hollywood (where the carpet is wrapped tightly around the nosing of each step). These styles can affect exactly how the rug is cut, but if you’ve measured the total length including treads and risers, you’re on the right track. It’s a good idea to have a professional installer handle staircase runners if possible – they will make adjustments on-site (using that extra few inches of carpet if needed) to ensure the runner lies flat and securely tacked down. A well-installed runner will avoid wrinkles or gaps that could trip you up. And of course, use proper padding underneath if offered, as it will keep the runner in place and add cushioning.
By carefully measuring your stairs and accounting for every step (literally!), you’ll end up with a custom stair runner that fits like a glove. No gapping on the edges, no coming up short at the top step – just a gorgeous, continuous flow of carpet that makes your staircase the centerpiece it deserves to be. And most importantly, you’ll walk up and down with confidence, free of rug-related worry!
Conclusion & Call to Action
Correctly measuring your space before ordering a rug or runner is the single best way to avoid rug regrets. A little time with a tape measure (and some masking tape on the floor) can save you from the common pitfalls of rugs that are too small, too big, or just poorly placed. You’ll be rewarded with a rug that fits perfectly – enhancing your room design, not detracting from it. As a result, you’ll feel more confident in your purchase and enjoy your custom area rugs and runners for years to come.
Ready to get started? Our team is here to help every step of the way. We invite you to download our free Measuring Guide for rugs and runners – a handy PDF checklist that walks you through each scenario with diagrams (so you can measure like a pro). If you’re still unsure about sizes or want to feel the materials first, you can order free swatches to compare textures and colors in your home. And for personalized advice, don’t hesitate to connect with one of our design consultants for one-on-one help. We love talking design and can offer guidance tailored to your unique space and needs.
Don’t let sizing worries hold you back from the rug of your dreams. With these tips and our expert support, you can move forward and create a room you’ll love – no regrets, just perfect rugs. Happy decorating, and remember: measure twice, order once, and enjoy your beautiful custom rug solution with total confidence!
Sources: (What To Do With A Rug That Won't Fit — DESIGNED) ( 6 area rug mistakes to avoid: experts advise what to do instead | Homes and Gardens) (10 Area Rug Placement Dos and Don’ts) (Choosing THE RIGHT Rug Size For Every Room (All Of Our Tips And Tricks) - Emily Henderson) (Finding the Perfect Fit: Area Rugs) (Finding the Perfect Fit: Area Rugs) ( 6 area rug mistakes to avoid: experts advise what to do instead | Homes and Gardens) (5 Rug Mistakes That Are Making Your Space Look Smaller) (Choosing THE RIGHT Rug Size For Every Room (All Of Our Tips And Tricks) - Emily Henderson) (Beija Flor World) (Finding the Perfect Fit: Area Rugs) (How to Keep a Rug in Place on Wood Floors: 4 Ways That Really Work - RugPadUSA) (How to Measure for a Stair Runner – Direct Carpet ) (How to Measure for a Stair Runner – Direct Carpet ) (Basic Measurement Guide for Stair Runners) (How to Measure for a Stair Runner – Direct Carpet ) (How to Carpet a Spiral Staircase)
Share:
Elevating an Entryway: A DIY Staircase Transformation with the Juliette Custom Runner Rug
Behind the Scenes: Unboxing & Installing Our First Custom 12×12 Rug in NYC